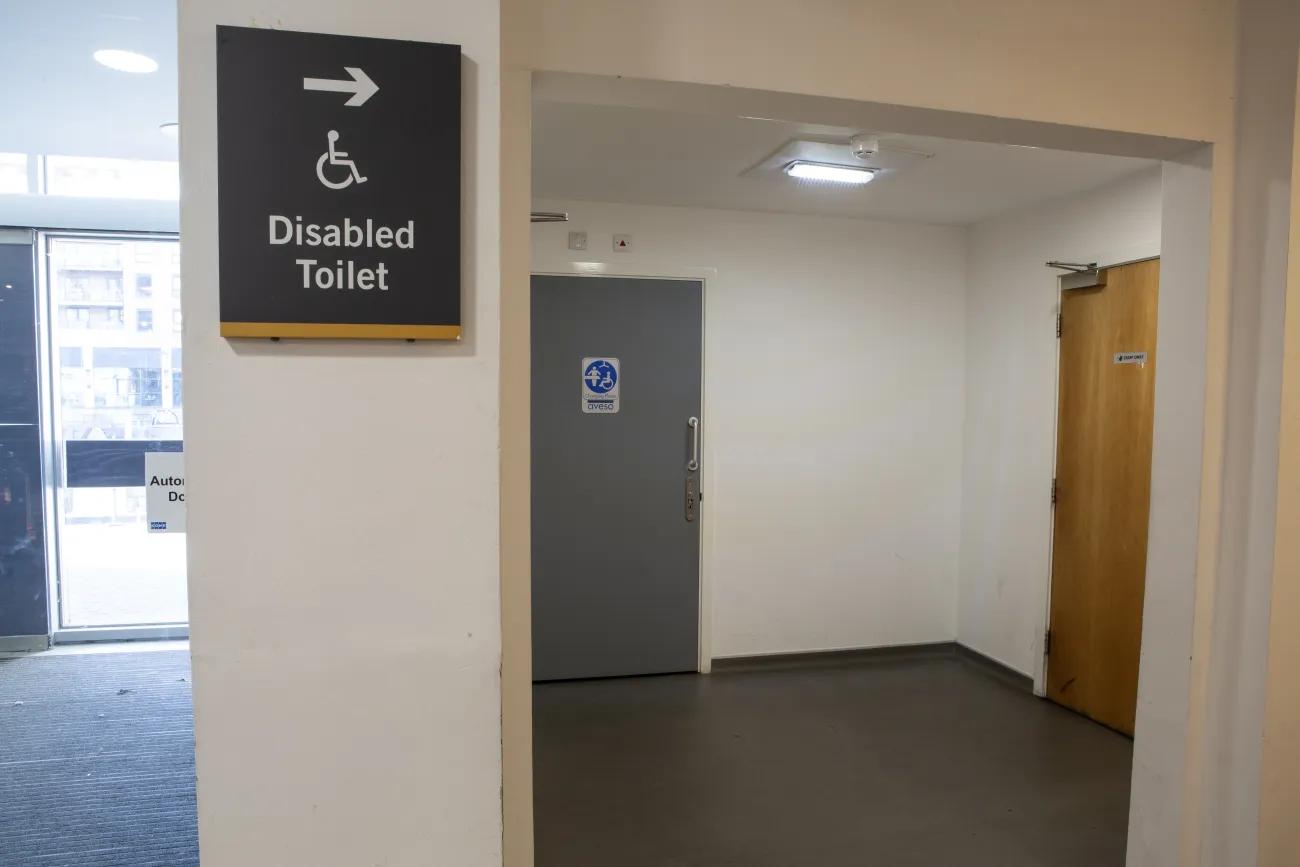
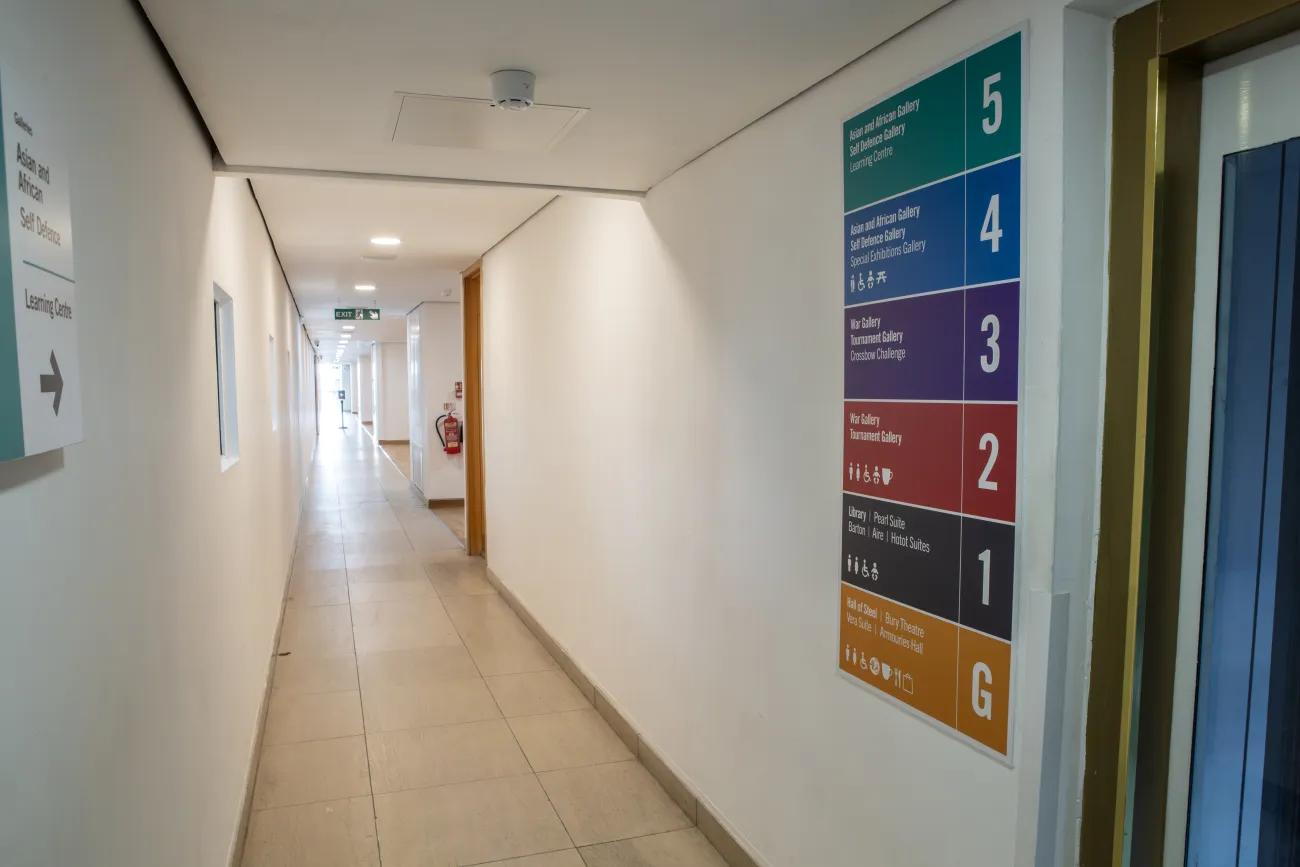
A Tour of the Royal Armouries

Welcome to the Royal Armouries Museum in Leeds - the national museum of arms and armour. To support people with accessibility needs, we have created a simple visual guide that shows what to expect in each part of the museum.

Accessible Icons

Colour coding:
1️⃣ Quiet / Low sensory
2️⃣ Medium sensory
3️⃣ Loud / High sensory

Icon set used:
🚪 Entrance | 🧭 Directions | 🛗 Lift | 🪜 Stairs | 🧑‍🤝‍🧑 Staff
🦽 Accessible | 🎧 Loud | 💡 Dim | 👀 Bright | 🍴 Food | 🚻 Toilet
🧩 Interactive | 🎭 Performance | 🪑 Seating | 🎒 Locker | 🎒 Sensory Bag

Live Performances

Two men, one in black doublet and hose and one in red doublet and hose, duel with swords

There are live performances in the galleries 🎭. These can be loud 🔊, especially during busy periods. The staff 🧑‍🤝‍🧑 that perform the shows are actors. Look at the show sheet when you arrive for more details. 

Royal Armouries Staff

Two women in blue uniforms stand behind a wooden table in front of a fireplace

Most staff 🧑‍🤝‍🧑 wear blue uniforms and all wear lanyards. They are in all the galleries. Speak to staff if you need help, are lost 🧭, or if you want to talk about your favourite objects. 

Before your visit

A man in a toga sits on a stage and instructs a young listener on how to wield a sword

The museum is free to enter.

During school term time, it is open Tuesday to Sunday, 10am to 5pm. 

During school holidays, it is open every day, 10am to 5pm. 

The museum is usually quieter after 3pm.

During busy periods, like school holidays, we suggest booking a ticket on the website. You can also find information about special events on the website.

For more detailed information on accessibility, please visit our Accessibility page.

For a closer look around the galleries, we have a virtual 3D tour available on the website.

Getting Here

Two men on horseback and in Tudor era dress greet the crowd behind a wooden fence
By Car

The nearest carpark is Citipark at Leeds Dock. 

The postcode is LS10 1LE. 

The What 3 Words are : events.layers.input

Find information about Citipark at Leeds Dock on their website.


On Foot

If you are walking from the city centre, cross Crown Point Bridge then make your way down Armouries Way. 


By Train

From Leeds Train Station, you can take the Water Taxi. It goes directly to Leeds Dock, next to the museum. 

The opening times of the Water Taxi change throughout the year. For more information, visit their website

When you arrive

A photo of a large, steel-bound concrete carpark next door to a large white Holiday Inn

If you arrive by car, the Citipark at Leeds Dock is the nearest car park to the museum.

A satellite photo of the Royal Armouries with three routes to enter marked out in yellow, red, and blue

This is a map showing how to get from the car park to the museum.

The car park has two ways out for pedestrians.

The red route goes through the main exit and along a pedestrian street.

The blue route exits onto a road, past the Tiltyard, and across a pedestrian square.

A colour photo showing a road leading to a large square flanked by bare trees

Blue Route

If you leave through the same side that you drive in, you will see a Holiday Inn Express on your left. 

A colour photo of a large grey building with a row of cannons besides a line of bollards allowing access to a road

Go past the Holiday Inn and you will reach the square. Go across the square to reach the main entrance. 

A photo of two buildings opposite one another over a wide alley. One is clad in copper green, the other has a long rainbow in the window.

Red Route

If you leave the car park through the main pedestrian exit with the lifts, turn right at the junction shown here.

A colour photo of a wood and steel archway framing the entrance to a museum. Above it says Leeds Dock in white lettering.

After turning right at the junction outside the carpark, go under the Leeds Dock sign. 

The main entrance will be straight ahead.

A large grey tower attached to a grey building sits besides a dock

Yellow Route

The glass tower, or Hall of Steel, is at the opposite side of the museum to the entrance. 

If you are walking, follow the path with the museum on the left and the water on the right.

A wall of plate glass with the word shop in large red letters in the window. A Christmas tree and various gifts are also on display.

Walk past the gift shop window and café on your left.

A flagstone-paved path between a high walled grey building and a body of water.

Pass the shop and café and walk towards the yellow building called 'The Canary'.

Around the corner, there should be a large square.

Turn left to reach the main entrance to the museum. 

Two grey banded columns flank an entrance way fronted with glass

This is the main entrance. 

The automatic doors will open as you get close.

Rules of the Museum

  • You are allowed to take pictures but flash photography is not allowed.
  • You are allowed to eat and drink in the designated picnic areas. Please do not eat or drink in the galleries.
  • You are not allowed to touch the objects on display. There are regular handling sessions where you are allowed to touch and hold objects if you want to. Always listen to the assistant on how to treat the objects.
  • Assistance dogs are welcome in the museum, but pets are not allowed.
  • You are allowed to visit the library, but you must ask in advance. Please email enquiries@armouries.org.uk for more information. 

Ground Floor

A colour map of the ground floor of the Royal Armouries

On the ground floor, you will find: 🚪🧭2️⃣

  • Staff in blue uniforms 🧑‍🤝‍🧑
  • Café and shop 🍴🛍️

We have an Information Desk, where you can: 1️⃣

  • Borrow a wheelchair 🦽
  • Borrow a sensory bag (ear defenders + sensory items)🎒
  • Collect locker tokens 🛅
  • Hearing loop available

Ground Floor Facilities 🚻

  • Lockers 🛅
  • Male and female toilets 🚻
  • Accessible toilet 🦽
  • Changing Places toilet available (RADAR key needed) 🦽
A woman in a blue uniform stands in a entrance hall greeting visitors

You will enter the museum on the ground floor. After passing through the second set of sliding glass doors, you will be: 

  • Greeted by a member of staff 🧑‍🤝‍🧑
  • Offered help
  • Guided to the information desk 🧭
A glass fronted cafe with warm lighting inside and tables and chairs

On your way to the information desk, the café 🍴 is on your left. It offers food and drinks, free water, male and female toilets, and an accessible toilet 🚻.

A corridor leads to a side portion of a cafe where visitors can find the toilets

The ground floor toilets 🚻 are in the café, past the counter and to the left. 

You can collect tap water in the café if you need a drink. 

Do not drink water from the taps in the toilets.

A gift shop fronted in glass with displays of various items in the window

On your way to the information desk 🧭, the museum shop 🛍️ is on the left.

A woman in a blue uniform welcomes visitors behind a dark coloured desk. On the desk can be seen guide books to the museum.

This is the information desk. A member of staff at this information desk will:

  • Give you directions 🧭
  • Tell you about our live shows 🎭
  • Offer you a souvenir guidebook (you can say yes or no).

Only card payments are accepted. The desk has a hearing loop and is accessible for wheelchair users.

At this desk, you can collect:

  • A locker token for £1 🛅
  • A sensory bag to borrow for free 🎒
  • A wheelchair to borrow for free 🦽
A yellow bag with a stuffed elephant toy, ear defenders, a fidget spinner, a stress ball, and a fidget toy

The sensory bags 🎒 include ear defenders and a range of sensory toys and objects. Hand these back to the information desk 🧭 when you have finished using them. 

A wide hallway with cages filled with merchandise available to buy such as swords and helmets. At the far end of the hall, there is a set of closed glass doors.

Further on from the information desk 🧭, just before the lifts 🛗, you will see retail cages with items in them you can buy from the shop 🛍️

To the right of these cages are lockers 🛅, a changing places toilet🦽, and the stairs to floor 1 🪜

A disabled toilets sign indicating towards a grey door inside an alcove

This is the changing places toilet on the ground floor🦽🚻. For access you need a RADAR key. You can borrow one from the information desk🧭if you don't have one. 

A grey bank of lockers sits alone in a side alcove just off the wide hall with retail cages.

There are two sets of lockers 🛅 on the ground floor.

One set is found next to the changing places toilet 🦽🚻

This is where you can store your coat and bag while you look around the museum. You will need a £1 coin.

If you do not have a £1 coin, you can pay for a token by card at the information desk 🧭

These tokens or £1 coins are non-refundable. 

A flight of stairs disappear around a corner next to a bank of lockers

A second set of lockers 🛅 can be found next to the stairs up to floor 1. This can be found on your right as you approach the retail cages.

Floor 1

A colour map of the first floor of the Royal Armouries

On floor 1, you can find:

  • Male and female toilets🚻
  • An accessible toilet🦽
  • Baby changing facilities🦽
  • The library, which is viewable by appointment only.

All the toilets in the museum have hand dryers which can be noisy. These facilities may be busy if there are functions on this floor. Other visitors and staff will be using all toilets, but there are cubicles. 

Going up to the Galleries

A board in front of a row of lifts displaying in colour the different floors of the Royal Armouries Museum

There are boards with maps 🧭 near the lifts 🛗 on the ground floor and floors 2 and 4. They also list the gallery rules to help you during your visit.

A grey floored hallway with two lifts in white facing. This set of lifts sits to the side of a large grey wall with metallic lettering reading 'Hall of Steel'.

Behind the information desk, you will see 4 glass lifts 🛗 which you can use to go up to the galleries. The galleries are on floors 2, 3, 4, and 5. 

The gold-coloured lift (first on the left when facing the Hall of Steel) is the only lift that will take you up to floor 5. 

Two columns with silver lettering indicate the Hall of Steel. Inside, a large mirrored object sit in the centre of a hall, surrounded by cannons pinned upright to the wall.

This is the Hall of Steel. This is a good starting point before heading up to the galleries. 

It can be loud 🔊 and echoey in here.

A photo of the Hall of Steel with thousands of weapons and pieces of armour lining the wall

Look up or look into the mirror in the Hall of Steel. There are 2,500 pieces of arms and armour on the walls!

A flight of steel and glass stairs rise up and around the inside of a tower. In the centre of the ground floor of the tower sits a large mirror flanked by cannons pinned to the wall.

A staircase 🪜 winds around the Hall of Steel which can take you up to floors 2 and 4.

Floor 2

A colour map of the second floor of the Royal Armouries

On floor 2, you will find: 🛡️⚔️3️⃣

  • Large displays of armour 🛡️⚔️
  • Mannequins of people and animals
  • Touchscreens and interactives 📱
  • Some areas have loud sounds 🔊 or bright lights 👀
  • The “Gun Machine” interactive has sudden gunshot sounds 🔊
  • Live demonstrations may take place 🎭

Facilities:

  • Toilets 🚻
  • Small café (sometimes open) 🍴 
An entrance to a gallery floor about war and tournaments, framed in glass and steel

On floor 2, you will find the War and Tournament Galleries. If you are walking up the Hall of Steel staircase 🪜, turn left at the entrance pictured here to access the galleries.

A wide open picnic space nestled between columns and with a five panelled digital display at the far end.

The first thing you will see on floor 2 is the picnic area and digital playground. The Hall of Steel staircase 🪜 is opposite the digital playground. 

A wall of five human sized monitors displaying five characters from history, including a knight and a samurai in armour, a women in a purple dress from the 1940s, and a man in a Victorian suit.

The digital playground is an interactive display 📱 where you can discover arms and armour through the stories of the people who used and made them. 

The interactive can be noisy 🔊 during an audio 'take over', which happens every 20 minutes. 

There is a countdown warning on the small screens. 

All other sound is delivered through headphones. 

There are 2x headphones per station to allow 2x people to experience the interactive together. 

All stations are accessible for wheelchair users 🦽

A small cafe with a few tables and chairs arrayed outside the main countertop

To the right of the digital playground, there is a small café 🍴 that is only open during busy periods. 

You can use the tables and chairs 🪑 to eat your own picnic when the café is closed. 

Please don't bring food and drink into the galleries. 

The café also has male and female toilets 🚻, as well as an accessible toilet 🦽. These are open every day. 

War Gallery on Floor 2

A entranceway to the War Gallery showing panels with soldiers and warriors from throughout history

To the left of the digital playground is the entrance to the War Gallery. This gallery is the largest and often the busiest. 

This floor looks at the arms and armour of war. 

A photo of a display of armour with mannequins on horseback and on foot forming a cross on the floor

You will see large displays like these in every gallery. Some displays have barriers around them to keep you and the objects safe. Most objects are inside glass cases, so you can look closely but not touch them. 

A battle scene of Pavia where mannequins on horseback in full plate armour are held back by mannequins with pikes in Renaissance dress.

There are also mannequins in the museum. Some are human-sized, while others are large animals like horses and elephants. These are models to show how arms and armour were worn and used. They are not animatronics so will not move or make noises. 

A visitor assistant in World War Two era Soviet battledress stands behind a table filled with Soviet weapons.

Sometimes in the War Gallery, there will be an object handling table 🧩. These objects can be touched, but you do not have to. Ask the staff to help you with this.🧑‍🤝‍🧑

An interactive display allowing children to feel weapons such as polearms and swords used during the late Medieval era.

In the War Gallery, there are interactive displays and screens 📱 you can touch. Some interactives read information out loud when touched. These are labelled with speaker icons 🔊

Two photos depicting the seating arrangements on the second floor. One half shows a folding stool hanging on a hook on the wall. The other half shows a wooden backed chair in front of a video screen with headphones.

If you need a rest, there are benches, chairs, and foldable stools available throughout the galleries.🪑

A dark room with plain wooden benches facing a screen showing a film about Marston Moor

In the War Gallery, you can find cinema alcoves where you can sit and watch videos. These areas are darker 💡 than the rest of the gallery, and the speakers are loud 🔊

A neon coloured shooting range with fake assault rifles facing an assortment of targets.

Near the Battle of Agincourt display is an interactive electronic shooting range. This is a paid experience. The range has very bright lights 👀 and loud noises 🔊, including simulated gunshots. The area around the range may become busy with other visitors. 

A wide-angle shot of the interior of the war gallery in the Royal Armouries, showing a white wall with arms and armour and a large painting of a 17th century officer on a horse

To reach the Tournament Gallery from the War Gallery, turn right at the War Gallery fireplace in the centre of the gallery. Walk towards the Napoleonic display and exit onto the balcony overlooking the ground floor below. 

A photo of the entryway to a tournament gallery in steel, glass, and concrete.

Floors 2, 3, 4, and 5 have bridges crossing over from one side of the museum to another. 

Cross over the bridge on floor 2 to reach the Tournament Gallery. These bridges are very high and may not be suitable for those with a fear of heights. 

A long corridor with vinyl wall covering showing the way to the tournament gallery

If you wish to avoid the bridge, follow the balcony corridor back to the picnic area 🪑 where you first entered the War Gallery. There is another entrance to the Tournament Gallery to the right of the digital playground.

Tournament Gallery on Floor 2

A photo of the tournament gallery on floor 2, featuring glass cases with full suits of armour and a duelling ring leading to a red and white pavilion at the far end of the room.

This is the Tournament Gallery. It is smaller and quieter than the War Gallery, although there are some speakers playing music quietly. This gallery is bright 👀, with one dark area 💡 that can be avoided.

In the middle of the gallery, there is a Tournament Ring. This is where you can watch live demonstrations 🎭, which can be very busy and noisy 🔊

A photo of a distinctive horned helmet with metal spectacles and rictus grin

Can you spot our famous Horned Helmet somewhere in the Tournament Gallery?

A photo of two sets of armour, one in the foreground and one in the background.

There are many pieces of armour in the Tournament Gallery, including a suit that once belonged to King Henry VIII.

A photo indicating where the stairs are in the Tournament Gallery that takes visitors to the third floor.

At one of the Tournament Gallery, you can see a red and white tent which you can enter. Just behind the tent, there are a set of brown double doors that lead back to the floor 2 café area 🍴, toilets 🚻, and lifts🛗

Next to the double doors, in the corner of the gallery, are the stairs 🪜 to floor 3. 

A white stairwell with steps leading up and around to the next floor

These are the stairs 🪜 in the Tournament Gallery up to floor 3.

Floor 3

A colour map of the third floor of the Royal Armouries

On floor 3, you will find:

  • Jousting video 2️⃣ (can be loud🔊)
  • Crossbow Range 3️⃣ (dark 💡 and loud 🔊; ear defenders available)
  • Interactive displays about modern warfare 2️⃣

Tournament Gallery on Floor 3

A broad view of the third floor tournament gallery, with red carpet and a balcony running around the edge.

Floor 3 is a balcony level, so you can loop around the Tournament Gallery in a circle. The TV in the modern jousting exhibition can be loud 🔊 as it does not have headphones attached.

A roped waiting area outside a wooden kiosk with gifts and a till.

Opposite the jousting display in the Tournament Gallery on floor 3, there is a set of double doors. Through these doors, you will find a Crossbow Range. 

Here, you can shoot a crossbow at a target if you would like to 🧩. This is a paid activity. On a busy day, there may be lots of people also waiting in this area to shoot a crossbow. 

Booths with wooden partitions, each with a crossbow bolted to a desk. The walls are dark forest green.

The Crossbow Range is dim 💡 and noisy 🔊. Ear defenders are provided. The range is fully accessible for wheelchair users 🦽

A grey corridor stretching beyond the camera, with a wall advertising a crossbow range beside it.

To reach the War Gallery from the Crossbow Range, walk towards the balcony corridor overlooking the ground floor. Turn right and follow the path to the bridge crossing over to the War Gallery. 

To avoid the bridge, use the lifts 🛗 on your left as you exit the Crossbow Range. On floor 2, cross the picnic area 🪑 to the opposite set of lifts and return to floor 3. 

A suit of armour in a glass case looking out onto the entrance of the gallery

To reach the War Gallery from floor 3 of the Tournament Gallery, follow the balcony until you reach the 'Lion Armour'.

Move past the 'Lion Armour' and cross the bridge into the War Gallery. 

War Gallery on Floor 3

A concrete archway entrance to a third floor gallery on war.

As with the Tournament Gallery, Floor 3 in the War Gallery is also a balcony. 

You can loop around this floor in a circle, starting at the blue bulletproof jacket. 

An overview of one section of a war gallery, including arms and armour from the First World War in glass cases.

On this floor, you can discover objects from 19th and 20th century warfare. This includes descriptions from the First and Second World Wars. 

In the First World War area, there is a speaker in the ceiling 🔊 that activates when you walk underneath. It can start unexpectedly.

In the Second World War area, there is a projector screen with audio containing shouting voices and gunshots 🔊

A blue flak style jacket in a glass case faces the entrance to a museum gallery

To take the lift 🛗 to floor 4, follow the balcony around until you reach the blue bulletproof jacket again. Exit the gallery here and then turn right. 

Walk down the balcony corridor until you reach the lifts 🛗.

A flight of stairs running down from the third floor of the war gallery to the second floor.

To take the stairs to floor 4, follow the balcony in the War Gallery towards the blue bulletproof jacket. 

Opposite the display case is a staircase 🪜 that leads down to floor 2 of the War Gallery. 

A fake stone effigy of a knight from the high medieval era. Next to the effigy are glass cases with medieval arms and armour.

At the bottom of the stairs on floor 2, look for the reproduction of the medieval tomb. 

Turn left past the tomb towards the gallery exit. 

A grey corridor leading down to a blank space at the far end.

After leaving the War Gallery, look to your right and follow the balcony corridor. 

This will return you to the floor 2 lift area 🛗 and the Hall of Steel.

A simple stone and steel staircase with a concrete wall on one side and a clear glass wall on the other.

Take the Hall of Steel stairs 🪜 or the lifts 🛗 to reach floor 4.

Floor 4

A colour map of the fourth floor of the Royal Armouries

On floor 4, you will find: 2️⃣ 

  • Dojo shows (may be busy) 🎭
  • Picnic area 🍴
  • Escape Room desk 📱
  • Special Exhibition (Subject to change)
  • Quiet areas available in Self-Defence Gallery  1️⃣

This floor has dim lighting 💡and occasional noises 🔊 from video displays

Facilities:

  • Toilets, including gender-neutral and accessible options 🚻
An entrance way of steel and glass leading to a wider picnic area with colourful chairs.

On floor 4 you will find the Asian and African, Self-Defence, and Special Exhibition galleries. 

If you are walking up the Hall of Steel staircase 🪜, turn left when you reach floor 4 to enter onto the floor. 

A photo overlooking the picnic area of the fourth floor of the Royal Armouries Museum in Leeds.

On floor 4, in the main foyer and lift area 🛗, you will find a picnic area where you can eat your lunch 🪑

As with floors 2 and 3, please do not bring food and drink into the galleries. 

A blank white wall features plain light brown doors leading to rest rooms

Toilets 🚻 can be found to the right of the picnic area. These facilities include gender neutral toilets, an accessible toilet, and a baby changing room🦽.

A photo of an open space with a dark, futuristic looking desk beside some double doors.

On the opposite side of the picnic area 🪑, you will see the desk for the Escape Room. 

The staff 🧑‍🤝‍🧑 working at the RA/ID Escape Room Experience will be wearing black t-shirts or jumpers. 

You can find out more information on the Escape Room by looking at their website

Asian and African Gallery on Floor 4

The entrance to a museum gallery is in darkness, framed by a square white archway

Walk past the Escape Room desk to reach the entrance to the Asian and African Gallery. This gallery is dimly lit 💡 with some background noise from videos 🔊

There are human and animal-sized mannequins in this gallery. These are not animatronic so will not make noises or move. 

A wooden arena with Japanese inspired decor, flanked on either side with wooden benches

In the Asian and African Gallery, you will find the Dojo where some live shows are performed 🎭. When these shows are on, the surrounding areas are busier. 

Information about daily shows will be given to you on arrival at the museum. 

An open plan room with glass cases displaying Japanese and Indian armour surrounds a life size model of elephant armour

Don't miss the amazing elephant armour! 

The Self-Defence Gallery can be accessed from behind the elephant.

A room filled with glass cabinets containing examples of Japanese feudal weaponry

You can also access the Self-Defence Gallery through the Japanese section. 

Walk towards the end of the Asian and African Gallery and turn right. This will take you into the Japanese section and through into the Self-Defence Gallery.

Self-Defence Gallery

A dark room with a long, semi-lit cabinet containing a variety of knives and other compact weapons for self-defence

This is the Self-Defence Gallery. 

This gallery is dimly lit 💡and video speakers can occasionally be loud 🔊

A darkened room with some sunlight coming in on the left hand side, lighting up a row of glass display cases. In the centre, a flight of stairs ascends away from the camera.

These stairs 🪜 can be found in the centre of the Self-Defence Gallery. They will take you up to floor 5. 

A darkened room with glass cabinets leads to an exit onto a bright corridor

To take the lift 🛗 to floor 5, walk towards the end of the gallery by the 'Make-Believe' display.

A plain corridor with beige flooring and grey concrete balconies punctuating one side.

After leaving the gallery, turn right and follow the balcony corridor back to the lift area. 

The gold lift 🛗 can be found on your left when facing the Hall of Steel. This is the only lift that will take you to floor 5. 

Special Exhibition Gallery

A black wall is marked by a steel banner announcing the Royal Armouries Special Exhibition

Opposite the floor 4 facilities is the Special Exhibition Gallery. 

The exhibitions in this gallery are temporary and the space will change with each new exhibition. 

For more information about temporary exhibitions, speak to a member of staff or email enquiries@armouries.org.uk in advance. In between exhibitions, this area will not be accessible to the public. 

Floor 5

A colour map of the fifth floor of the Royal Armouries

On floor 5, you will find:  1️⃣

  • Soft lighting 💡
  • Calm displays
  • A high bridge connects areas (staff can help if needed)

This is the quietest floor.

The top of a flight of stairs with an placard with an arrow pointing left

If you are taking the stairs 🪜 from the Self-Defence Gallery, follow the arrow and turn left at the top.

A long corridor leading away from the camera with an education room faced with glass on the left.

Follow the corridor around to the left to reach the exhibits on floor 5. 

Asian and African Gallery on Floor 5

A broad view of a balcony overlooking the Asian and African gallery

Floor 5 is another balcony level. Loop around in a circular route to explore our collection of Southeast Asian arms and armour.

This floor is usually the quietest and has soft lighting 💡

A long corridor leading from a lift to a balcony bridge

To get to the Asian and African Gallery from the gold lift 🛗, follow the corridor down and turn left at the bridge. 

There is currently nothing installed to the right of the corridor.

A view of a museum gallery interior from a bridge leading to it

Please be careful as this is the highest bridge in the building. 

It is 18m high, or 59 feet off the ground. 

If you are unable to take the stairs 🪜 from the Self-Defence Gallery and want to avoid this bridge, speak to a member of staff 🧑‍🤝‍🧑. They will help by taking you up in a different lift 🛗

Leaving the Museum

A long hall with Christmas decorations and a tree, leading to the museum entrance

When you are ready to leave the museum, return to the lift area or the Hall of Steel staircase on floors 2 and 4. 

Take either the lifts 🛗 or stairs 🪜 back to the ground floor. Walk down the hall with the shop and café on your right to reach the exit.

A satellite photo of the Royal Armouries museum with three routes to exit in yellow, red, and blue

This is a map showing how to leave the Royal Armouries.

The yellow route returns you to town.

The red route and blue route takes you back to the car park by two different routes.

A wood and steel arch with the words Leeds Dock across

Red Route

To get back to the car park, go back through the archway with 'Leeds Dock' written across the top. 

When you arrive at a building called 'Department' and 'Fearns', turn left. The car park will be in front of you. 

A photo of a road leading down past a hotel towards a car park

Blue Route

Another way to return to the car park is to walk towards the Holiday Inn Express. Follow the road with the hotel on your right. 

The car park entrance has a narrow pedestrian path running from the road into the building.

A dark blue and red sign with a map stood next to a pathway that runs by a river

Yellow Route

To return to the train station, turn right from the museum entrance. Walk along the dock with the café and shop on your right and the water on your left.

Look for this street sign with directions and a map to the train station and city centre. 

A rust-coloured outside shelter sat next to a dock

The Water Taxi is also found outside next to the café and shop. Look for the covered bench with the yellow sign. 

The Water Taxi is seasonal and may not run in bad conditions. Check the website for more information.

The Tiltyard

A wide open paved square leading to railings and a curve of cannons

The Tiltyard is an open-air arena used for special events such as jousting🐎. These can be loud 🎧 and busy 🎭 depending on the event.

To get to the Tiltyard, leave the museum and turn left towards the cannons and bike rack.

Cannons line a bend in the road leading towards a long dark grey wall

At the cannons and bike rack, follow the path to the left and past the grey wall until you reach the white canopy. 

A grey wall with two black iron gates on either side, covered by a white canopy

These gates are the main entrance into the Tiltyard. The Tiltyard can be busy and noisy 🔊 during special events.

The Tiltyard is also uncovered so dress for forecasted weather conditions if attending a show. 

There is a designated area for wheelchair users 🦽

The Amphitheatre

Two actors in Roman gladiatorial costume circle each other as a crowd looks on.

The Amphitheatre is an outside event space 🎭 used especially during the warmer months. Dress for the weather forecast.

To reach the amphitheatre from the museum, leave the main entrance and walk towards the yellow building called 'The Canary'. Turn right and walk with the dock on your left and the café and shop on your right. 

Ask a member of staff 🧑‍🤝‍🧑 if you require help along the slightly uneven path.

A stone semi-circle of stepped seating surrounding a circle of flagstones for performers.

This space is also uncovered and can get crowded during busier shows 🎭. Seating is provided on the stone steps with wheelchair space 🦽 provided in the front row. 

A colour photo of a large grey building beside a body of water. In front of and attached to the building is a large heptagonal glass tower with a staircase visible on the inside.

We hope to see you again soon at the Royal Armouries!